Visio Electronic Shapes Free Download
Circuit Symbol Shapes Library Shapes stencils for circuit components can be found here: • • To use these stencils place them in the Windows directory 'My Documents My Shapes'. Once they are placed there, they can be accessed in Visio from the main menu by: File > Shapes > My Shapes. • These symbols are meant to be used on a grid with units of 'Inches' which is the default measurement unit. The page measurement units can be set by the following procedure: File > Page Setup > Page Properties > Set 'Measurement Units' to 'Inches'. Saving Images For Use In LaTeX Method 1 This method prints the image to a PS file and uses GSView to save as an EPS file with the proper bounding box.
Download free Visio shapes stencils and templates for visio diagraming. VisioCafe is an independent non-profit web site for the gathering together of IT industry.
• Install the drivers for a Postscript printer if you don't already have one installed on your computer. If you are using the EECS windows servers, there should be one already installed. • The works well.
• Or install a random one: Start -> Control Panel -> Printers -> Add printer. Select a local printer and set its port as FILE. Choose a Postscript printer (ends in PS). GSView is already available on the Linux machines. • Select the objects in Visio that you want to save. • Print the selected objects: • Important!!
Under Properties->Advanded->PostScript Options->PostScript Output Option, select Encapsulated postscript (EPS). • Under Page range, select Selection.
• Save the file with a.ps extension • Open the PS image in GSView. Under the File menu, use PS to EPS and check 'Automatically calculate Bounding Box'. Save the file as an EPS. Visio BMP Output Options • Select the objects that you want to save as an image. • Go to: File > Save As.
• Under 'Save as type:' select 'Windows Bitmap (*.bmp; *.dib)'. • Choose a file name and location and click Save. • An output options form for the.bmp format will appear. • Choose 'Color format:' as Bi-level. • Set Resolution to 'Custom', 600X600 pixels/in.
• The options should look something like the figure to the right. • Next open the.bmp file with either GIMP Image Editor (Linux) or Adobe Photoshop (Windows) and save as a.eps file. • In GIMP Image Editor (In Linux go to Applications > Graphics): • Go to: File > Save as. • Save the file with a.eps extension. • Click Save.
• Keep the current settings. • In Adobe Photoshop: • Go to: File > Save As. • Under 'Format:' select 'Photoshop EPS (*.eps)'. • Click Save.

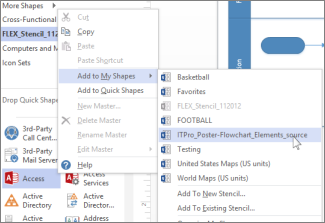
• An EPS Options form will appear. Set 'Preview:' to 'None' and 'Encoding:' to 'Binary' with no other options selected. Editing Shapes • Open the stencil you want to edit by going: File > Shapes > My Shapes > click on the stencil you want to edit. This will open the Shapes window with your stencil in it.
• Right click on the stencil title bar then select Edit Stencil. This toggles the stencil into edit-mode.
Chertezh biljyardnij stol avtokad. When in edit-mode a red asterisk will appear over the icon in the stencil title bar. • Double click on the shape you wish to edit.
The shape will appear in a drawing window where you can edit it. • Once you are done editing close the window and click Yes when asked to update the shape. • Save the stencil by right clicking on the stencil title bar and selecting Save.  • Un-toggle edit-mode by right clicking on the stencil title bar and selecting Edit Stencil. Creating New Stencils and Shapes New Stencils • Create a new stencil by going: File > Shapes > New Stencil.
• Name the stencil by saving with the name you want. This is done by right clicking on the stencil title bar and selecting Save. You can delete a stencil by deleting it from the My Shapes directory. New Shapes • Create a new shape by right clicking in the area under the stencil title bar where the shapes are displayed, and select New Master. • Enter the shape name and other options, then click OK. A blank shape icon will appear in the stencil. • Double click on the blank shape icon.
A blank drawing page will appear. • Create the shape. • Close the window and click Yes when asked to update the shape. • Save the stencil by right clicking on the stencil title bar and selecting Save. • Un-toggle edit-mode by right clicking on the stencil title bar and selecting Edit Stencil.